Preschool Art Activities to Spark Creativity
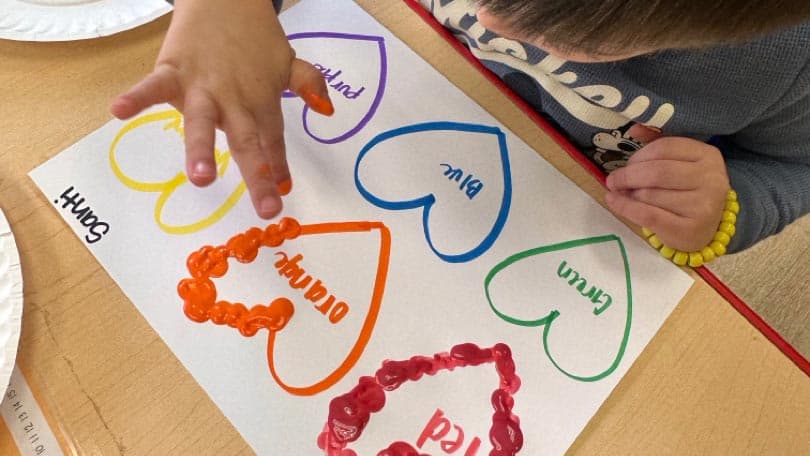
Art is a fantastic way for preschoolers to express themselves, but it goes even further than that; it also helps students develop their fine motor skills, creativity, and imagination! At Kiddi Kollege, our curriculum incorporates arts and crafts activities each and every week. Typically, these preschool art activities are based around themes relating to the current season or the topics we’re learning about in math, reading, or science.
Engaging in art activities at home can be a delightful and bonding experience for both parents and their little ones. In this blog, we’ll explore some fun and easy preschool art activities that you can try together at home. So, roll up your sleeves, gather your supplies, and let’s embark on a creative journey with your preschooler!
Finger Painting Fun
Finger painting is a classic activity that preschoolers adore. It allows them to explore colors and textures while using their fingers as brushes. Here’s how to set up a finger painting session:
Materials for Finger Painting
- Washable finger paints
- Large sheets of paper
- Aprons or old t-shirts for mess protection
Instructions for Finger Painting
- Lay out the paper and squirt some different-colored finger paints onto a palette or paper plates.
- Let your child dip their fingers into the paints and start creating their masterpiece.
- Encourage them to experiment with mixing colors and making handprints.
- When they’re finished, allow the artwork to dry, and don’t forget to display it proudly!
Nature Collage
Adventure is in your backyard… literally! With the right mindset, exploring the great outdoors can be a treasure hunt for natural art supplies. Collect leaves, twigs, flowers, acorns, and pebbles to create a beautiful nature collage.
Materials to Make a Nature Collage
- Pieces of nature
- Glue or tape
- Paper or cardboard as a base
Instructions for Making a Nature Collage
- Take a nature walk with your preschooler and gather interesting items.
- Return home and spread out your treasures.
- Encourage your child to arrange the items on the canvas and glue or tape them down to create their nature collage.
- Be sure to take advantage of teachable moments – discuss the names of each item, their textures, smells, etc.
Bubble Wrap Printing
Don’t throw away that Amazon packaging just yet! Instead, upcycle it for artistic preschool endeavors. Bubble wrap printing is a fun and tactile way to introduce your kiddo to the world of printmaking.
Materials for Bubble Wrap Printing
- Bubble wrap
- Paint
- Paper
- Paintbrushes
Instructions for Bubble Wrap Printing
- Cut a piece of bubble wrap to the desired size.
- Dip a paintbrush into paint and apply it to the bubble wrap.
- Press the bubble wrap, paint-side down, onto a piece of paper.
- Gently press and lift the bubble wrap to reveal a unique printed design.
- Let it dry, and if desired, add beads, buttons, feathers, or other textures to jazz it up further!
DIY Playdough
Making playdough at home is a fun activity in itself, and it provides endless opportunities for creativity through sculpting and molding. Below is a recipe from Jamielyn Nye, founder and recipe creator at I Heart Naptime.
Materials for DIY Playdough
- 2 cups all-purpose flour
- 3/4 cup salt
- 4 teaspoons cream of tartar
- 2 cups lukewarm water
- 2 tablespoons of vegetable oil (coconut oil works, too)
- Food coloring, optional
- Quart-sized bags
Instructions for DIY Playdough
- Stir together the flour, salt, and cream of tartar in a large pot.
- Next add the water and oil. If you’re only making one color, add in the color now as well.
- Cook over medium heat, stirring constantly. Continue stirring until the dough has thickened and begins to form into a ball. Remove from heat and then place inside a gallon sized bag or onto wax paper.
- Allow to cool slightly and then knead until smooth. If you’re adding colors after, divide the dough into balls (for how many colors you want) and then add the dough into the quart sized bags.
- Start with about five drops of color and add more to brighten it.
- Knead the dough while inside the bag so it doesn’t stain your hands. Once it’s all mixed together you’re ready to PLAY.
Watercolor Resist Art
Watercolor resist art is a magical activity that introduces your preschooler to the concept of resist techniques—the combination of media that repel or rebuff each other. It can be a fun way to write secret messages, too!
Materials for Watercolor Resist Art
- White crayons
- Watercolor paints
- Watercolor paper
Instructions for Watercolor Resist Art
- Draw a picture or pattern on the paper using white crayons.
- Once the design is finished, get out the watercolor paints.
- Paint over the crayon markings.
- Watch as the crayon resists the paint, creating a beautiful and mysterious effect!
For a visual guide and ideas to step up your artistic endeavors, check out this Watercolor Resist Art tutorial from Ana Dziengel of Babble Dabble Do, a kids’ STEM project blog.
Schedule a Tour at Kiddi Kollege
When you perform preschool art activities at home with your child, you’re creating cherished memories together, but also providing a wealth of educational benefits, too. Nurturing your kiddo’s creativity enhances their fine motor skills, imagination, and self-expression. Throw in some core content, such as math and literacy skills, and you’ve got yourself a well-rounded educational activity! So, embrace the mess, enjoy the process, and let your preschooler’s imagination run wild through these fun art adventures.
Looking for more excitement and learning opportunities for your preschooler? At Kiddi Kollege, we offer early childhood education classes for children as young as six weeks all the way through pre-K, and we offer afterschool care for kids through sixth grade, too. Schedule a tour today!
Enjoy content from Kiddi Kollege? Make us one of your preferred sources on Google.